Home Blog Page 17

Kevin Red Star opens gallery in Red Lodge

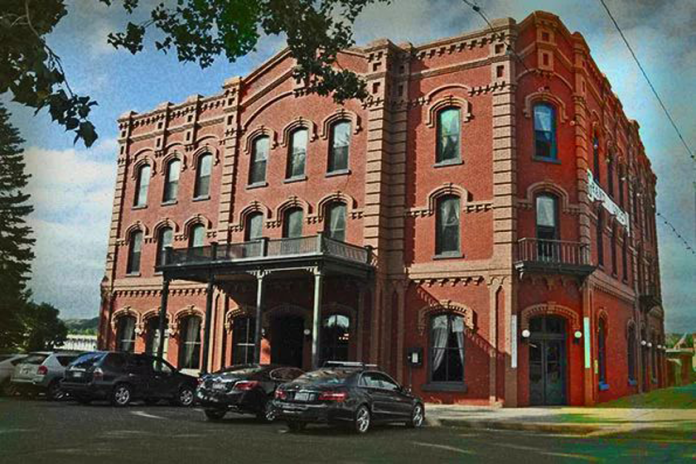
Kevin Red Star opens a new gallery in Red Lodge

Kevin Red Star opens gallery in Red Lodge — Kevin Red Star, a renowned Native American artist from Montana, has opened a new gallery in Red Lodge, marking a significant event in both his career and the cultural landscape of Montana.

The gallery’s grand opening was on September 19, 2024, in Red Lodge, MT. This event was anticipated to be a significant gathering, with interest from both the local community and art enthusiasts.

Red Lodge, located near the Beartooth Mountains and not far from where Red Star grew up on the Crow reservation, holds personal significance for him. This choice of location underscores his deep connection to the region’s landscapes and his cultural heritage, which profoundly influences his work.

Kevin Red Star is celebrated for his detailed depictions of Native American life, particularly the Crow culture, through paintings that blend historical accuracy with a distinctive artistic style that’s hard to categorize yet instantly recognizable as his own.

His journey includes being among the first students at the Institute of American Indian Arts in Santa Fe, which set the stage for his extensive career that has seen his works housed in major museums and collections worldwide. Despite his global reach, Red Star’s roots in Montana, specifically around Red Lodge and the Crow Reservation, remain central to his identity and art.

Although specific details about the gallery’s features or inaugural exhibits weren’t provided, one could expect it to showcase Red Star’s evolution as an artist, from his early works to his latest pieces, possibly including his unique interpretations of traditional themes using modern techniques.

The opening of such a gallery in Red Lodge not only enriches the local cultural scene but also likely serves as a hub for educational activities, workshops, or events that could promote understanding and appreciation of Native American art and history.

The event was not just about showcasing art but also about engaging with the community. Activities like a reception and a fashion show tied to Native American themes were part of the opening, aiming to make art accessible and relatable to a broader audience.

This new gallery in Red Lodge represents more than just a space for art; it’s a cultural beacon, reflecting Kevin Red Star’s life, his art’s evolution, and his contribution to preserving and promoting Native American culture through his work. This venture in Red Lodge might also inspire younger artists or those interested in Native American heritage, making it a pivotal cultural addition to Montana’s artistic landscape.

Kevin Red Star opens gallery in Red Lodge — to learn more about Kevin Red Star and to view his works, please visit his website at: https://kevinredstar.com/about/


The Montana Election Observation Initiative (MTEOI)

Montana Election Observation Initiative

The Montana Election Observation Initiative (MTEOI) represents a concerted effort to enhance the transparency and integrity of elections in Montana through nonpartisan observation.

MTEOI aims to increase public trust in electoral processes by having nonpartisan observers monitor various election stages, from equipment testing to the certification of results. This initiative was particularly highlighted during the Missoula County primary in June 2024, which served as a pilot to refine observation methodologies.

The initiative is supported by the Carter Center, a well-known organization for promoting democracy and peace, indicating the project’s emphasis on impartiality and international standards of election observation.

Jeff Mangan, a former Democratic legislator and election official, and Geraldine Custer, a former Republican state representative, co-chair the initiative, showcasing a cross-partisan approach to election oversight.

Following the pilot in Missoula, MTEOI plans to expand its operations to observe the general election in November 2024 across multiple counties in Montana, with recruitment for observers already underway. Observers receive training, materials, and a stipend, aiming to attract committed volunteers to monitor elections.

MTEOI encourages public participation not only through observer roles but also through an “Observer Panel” open to any member of the public, enhancing transparency by allowing citizens to witness election processes firsthand.

The initiative’s activities are part of a broader push for election security and integrity, reflected in other states and national dialogues. For instance, there’s mention of a House poll watcher program, indicating a trend towards scrutinizing election processes more closely.

Given its structure and the backing of the Carter Center, MTEOI could influence how future elections in Montana are conducted, potentially setting a precedent for other states or becoming a regular feature of Montana’s electoral process if it proves successful in enhancing trust and detecting irregularities.

The Montana Election Observation Initiative stands out as a nonpartisan effort to bolster the credibility of elections in Montana, aligning with global standards of election observation while responding to local needs for transparency and accountability in electoral processes.

The Montana General Election is on November 5, 2024.

For more information about MTEOI, you can visit the website here: https://mteoi.org/#activities

You can find the MTEOI recruitment form here: https://mteoi.org/observation


New species of Wasp discovered in the United States

New species of Wasp

A new species of wasp, named Syntretus perlmani, has been discovered in the United States, particularly noted for its gruesome method of reproduction that has drawn comparisons to science fiction horror, specifically reminiscent of the xenomorph from the “Alien” franchise.

Here are a few of the interesting things about this particular Wasp:

This wasp species lays its eggs inside living, adult fruit flies. Upon hatching, the wasp larvae burst out of the fly’s abdomen, a behavior previously unseen in parasitoid wasps which typically target the immature stages of their hosts.

The discovery was somewhat accidental, made by researchers at Mississippi State University while they were examining fruit flies for parasitic worms. This wasp was first observed in a backyard in Mississippi, leading to further study and confirmation of its existence across the Eastern U.S.

This finding is significant because it adds to the understanding of biological processes, particularly in parasitism. It’s the first known wasp to infect adult flies, challenging previous norms in parasitoid wasp behavior.

While initially seen as horrifying, this wasp might play a role in controlling fruit fly populations, which could have broader ecological implications given fruit flies’ nuisance status and their role in pest control.

The discovery has garnered attention for its macabre nature, leading to discussions where it’s been dubbed the “horror wasp” due to its method of emerging from its host.

Scientists are keen to explore further, looking into its infection biology, ecology, and evolutionary history. This could offer insights into biological control methods or deepen our understanding of insect behavior and life cycles.

This discovery of a new species of Wasp not only captivates with its horror movie-like biological drama but also opens avenues for ecological research and potentially innovative pest control strategies. However, as with any new species, especially those with such dramatic interactions with other species, there’s a mix of fascination and concern about how it might integrate into existing ecosystems or affect agriculture.


Homemade Krispy Kremes

Homemade Krispy Kremes

Homemade Krispy Kremes — While Krispy Kreme doughnuts are known for their special taste and texture, you can make a homemade version that captures the essence of their famous doughnuts. Here’s a recipe that attempts to mimic the original Krispy Kreme doughnuts:

Ingredients:

For the Dough:

2 1/4 teaspoons (1 packet) active dry yeast
1/4 cup warm water (about 110°F)
1 cup milk, scalded and cooled to lukewarm
1/4 cup sugar
1 teaspoon salt
2 eggs
1/4 cup shortening or butter, softened
4 1/2 to 5 cups all-purpose flour
Oil for frying (like vegetable or canola oil)

For the Glaze:

1/3 cup butter
2 cups powdered sugar
1 1/2 teaspoons vanilla
4-6 tablespoons hot water

Directions:

Activate Yeast:

In a small bowl, dissolve yeast in warm water with a pinch of sugar. Let it sit until it becomes frothy, about 5-10 minutes.

Mix Dough:

In a large mixing bowl, combine the milk, sugar, salt, eggs, shortening, and 2 cups of flour. Beat until smooth.
Stir in the yeast mixture. Gradually add enough remaining flour to make a soft dough.

Knead:

Turn the dough onto a floured surface and knead for about 5 minutes until smooth. Add flour as needed to prevent sticking, but keep the dough relatively soft.

First Rise:

Place the dough in a greased bowl, cover, and let it rise in a warm place until doubled, about 1-2 hours.

Roll and Cut:

Roll the dough out on a floured surface to about 1/2 inch thickness. Cut with a doughnut cutter or use a large and small round cutter to make doughnut shapes.

Second Rise:

Place the doughnuts on a floured or parchment-lined baking sheet, cover, and let them rise again until nearly doubled, about 30-45 minutes.

Fry:

Heat oil in a deep fryer or large pot to 350°F (175°C). Carefully slide doughnuts into the hot oil, frying a few at a time.
Fry until they turn golden brown, about 1-2 minutes per side. Flip once. Drain on paper towels.

Glaze:

While the doughnuts are still warm, dip them into the glaze.
To make the glaze, melt butter, then sift in powdered sugar. Stir in vanilla and enough hot water to achieve a thin, smooth consistency.

Cool and Enjoy:

Let the glaze set for a bit before eating, but these are best enjoyed while still warm or at least on the same day.

Tips:

Keep your oil at a consistent temperature for even cooking. Too hot and they’ll burn outside before cooking through; too cool and they’ll absorb too much oil.
If you want them less sweet or more like the classic Krispy Kreme, you might consider reducing the sugar slightly or adding a touch more butter for richness.

This recipe aims to give you a homemade version that’s close to the taste and texture of Krispy Kremes, though commercial doughnuts often have specific ingredients and processes that are hard to replicate exactly at home.


Christmas Lights Cookies

Christmas Lights Cookies

These whimsical Christmas Lights Cookies are not only fun to make but also bring a festive spirit to any holiday gathering. Here’s how you can create these delightful treats:

Ingredients:

For the Cookies:

2 ¾ cups all-purpose flour
1 teaspoon baking soda
½ teaspoon baking powder
1 cup butter, softened
1 ½ cups white sugar
1 egg
1 teaspoon vanilla extract

For Decorating:

Green food coloring
White, yellow, and various colored icing or royal icing
Edible markers or food-safe pens
Candy melts or melted chocolate (for the light bulbs)
Sprinkles or edible glitter (optional)

Directions:

Prepare the Dough:

In a bowl, whisk together flour, baking soda, and baking powder. Set aside.
In a large bowl, cream together butter and sugar until smooth. Beat in the egg and vanilla. Gradually blend in the dry ingredients. Mix well.
Divide the dough into two parts and tint one part with green food coloring. Wrap both portions in plastic wrap and chill for at least 2 hours, or overnight.

Roll and Cut the Cookies:

Preheat your oven to 375°F.
Roll out the green dough to about ¼ inch thickness on a floured surface. Use a Christmas light bulb cookie cutter or freehand cut light bulb shapes.
Place the cookies on a baking sheet lined with parchment paper. Bake for 8-10 minutes, or until the edges are lightly golden. Cool on the baking sheet for a few minutes before transferring to a wire rack to cool completely.

Decorate the Cookies:

Once cookies are completely cool, outline and fill each cookie with white or yellow royal icing to look like the glass part of a light bulb. Allow this to dry.
Use different colors of icing to create the base of the light bulb, where it would typically screw into a socket.
Use edible markers or food-safe pens to add details like lines or patterns on the light bulbs.
For more dimension, you can use candy melts or melted chocolate to create a cap on the top of the light bulb. Let this set.

Final Touches:

Add sprinkles or edible glitter if you want to give your cookies a bit more sparkle and festive look.

Assembly (Optional):

If you want to make a string of lights, you can connect the cookies with a thin line of white icing to simulate the wire connecting the lights.

Tips:

Use gel food coloring for vibrant colors; it won’t thin out the dough like liquid food coloring might.
Royal icing should be thick enough to hold its shape but spreadable. You might need to adjust with water or more powdered sugar.
Allow each layer of icing to dry completely before adding the next to avoid smudging.

These Christmas Lights Cookies are sure to light up your Christmas with their playful design and delicious taste.

Enjoy crafting and eating these festive treats!